We often get asked if we have a Mac version of HttpWatch. Unfortunately, the answer is no and it is likely to stay that way in the short term as it would take a significant amount of effort to port it to Mac OS X.
However, we decided to take a look if to see if there was a simple way to access HttpWatch on the Mac. Having used VMware extensively for testing HttpWatch on different versions of IE, Firefox and Windows the VMware Fusion product was an obvious candidate.
The result was much better than we initially hoped for. Vmware Fusion is able to run IE 9 and HttpWatch directly on the Mac desktop alongside other Mac applications:
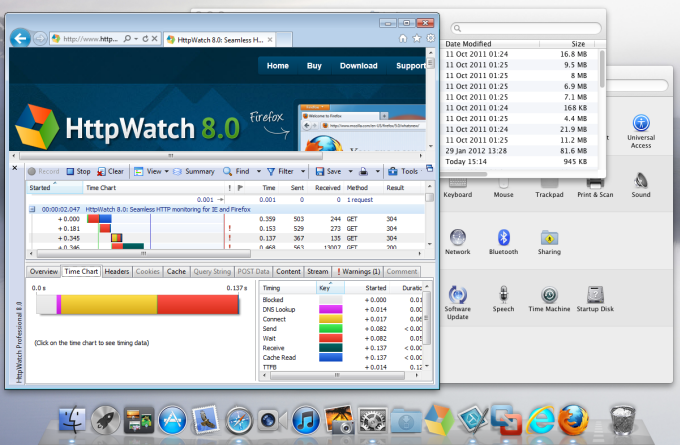
We were even able to setup short-cuts to directly run HttpWatch Studio from the Dock allowing it to open HttpWatch log files or HTTP Archive files (.HAR) stored on the Mac file system.
The rest of this blog post describes how we setup VMware Fusion to run HttpWatch, IE and the Windows version of Firefox. Parallels Desktop for Mac also seems to have similar capabilities and could probably be setup in a similar way.
What do you need?
We used the following software:
- VMware Fusion 4 – this costs $50 and has a 30 day trial option allowing you to try it out first
- Windows 7 – you’ll need an installation CD/DVD or an ISO image and a valid license key. You could use older versions of Windows too
Setting up VMware Fusion and Creating a Windows Virtual Machine
Our setup was created by following these steps:
- Download and Install VMware Fusion on the Mac
- In VMware Fusion->Settings->General select the ‘Suspend the virtual machine’ option so that you don’t have to restart Windows every time you open the Windows Virtual Machine (VM)
- Start VMware Fusion and right click on the icon in the Dock. Then select Options->Open at Login to ensure that the Windows VM is available when you restart your Mac.
- Create a new Windows VM by going to File->New in VMware Fusion
- Either insert your Windows installation CD/DVD into an optical drive or click ‘Continue without disc…’ if you are going to use an ISO installation image
- Click Continue and then check that VMware Fusion shows the correct version of Windows.
- Click Continue and use the Windows Easy install option to setup the Windows administrator account and supply the Windows license key.
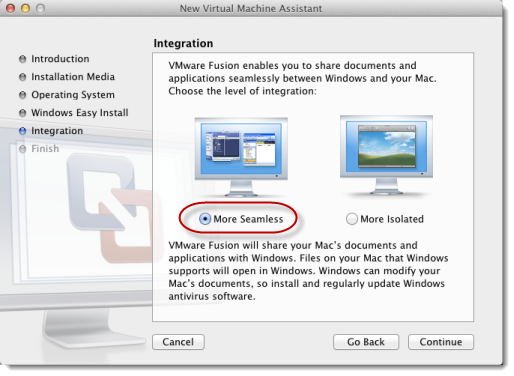
- Click Continue and select the level of integration required between Windows and Mac OS X. We chose ‘More Seamless’ as it maps the Windows documents directory on the Mac documents directory:
- Click Continue and run the Windows installation
Configuring the Virtual Machine
- In VMware Fusion select the Windows virtual machine and then click the Virtual Machine->Settings menu item
- In General click on ‘Start automatically when VMware Fusion launches’
- Optionally, you may want to allocate more CPU and memory resources to the Windows VM to improve performance. You can do this in the ‘Processors and Memory’ section of the Virtual Machine settings, but only if the VM has been shut down. On a 8GB Dual Core Mac Mini we assigned 2 processor cores and 2048 MB of RAM
Configuring Windows
Open the Virtual machine and interact with the Windows desktop to:
- Apply all the latest patches using Windows Update
- Download and install HttpWatch
- Optionally, setup Windows so that it automatically logs into the account you configured during setup. To do this follow the steps in described in http://channel9.msdn.com/Blogs/coolstuff/Tip-Auto-Login-Your-Windows-7-User-Account
Setting up Integration with Mac Desktop
Once you’ve got the Windows VM machine configured and running select the View->Unity menu item in VMware Fusion. It will close the view of the Windows desktop and run Windows applications on the Mac desktop. It even displays icons from the Windows system tray on the Mac menu bar:

You can then start Windows applications that you want to use (e.g. IE or HttpWatch Studio) by going to the VMware Fusion dropdown menu and typing in the application name or selecting it from All Programs:
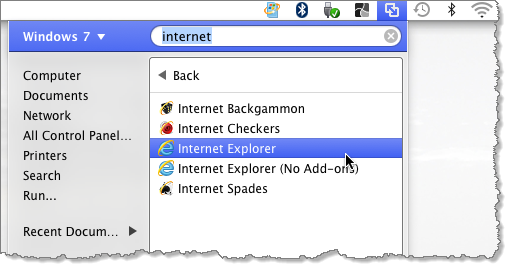
The application’s window will then appear on the Mac desktop and its icon will be in the Dock. By right clicking on the icon you can permanently add it to the Dock:
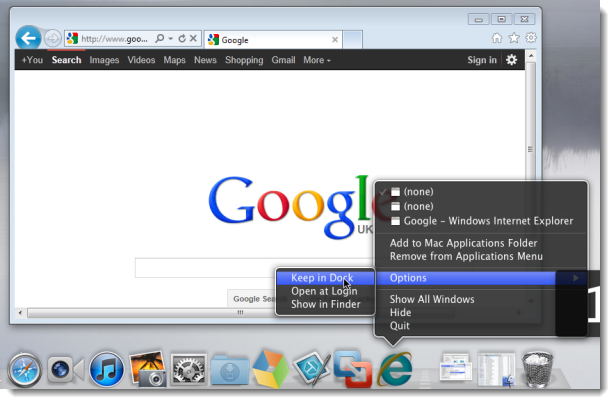
VMware Fusion also applies the file associations found in Windows. That allows you to directly open HAR or HWL files on the Mac directly into HttpWatch Studio:

What about Performance?
Initially, we tried running VMware Fusion on a basic Mac mini with 2GB RAM. It was very sluggish at times; particularly when it first started up the Windows VM. However, a $ 46 memory upgrade to 8GB solved that issue allowing Windows applications to Start as quickly as native Mac applications.
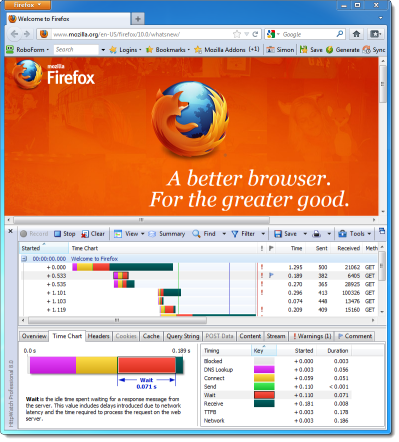
We also did some comparisons, running page load tests with HttpWatch in IE 9 and Firefox 10. The performance of the Windows VM on the Mac wasn’t noticeably slower than a native Windows PC with a similar spec.
