SSL certificates are relatively cheap to purchase, but sometimes it would be easier if you could create your own. You might need to setup SSL on development and test servers that have different host names or on systems that will only ever be accessed on your local network.
Self-signed SSL certificates allow you to quickly create certificates for free, without having to pay a Certificate Authority (CA) or comply with any auditing requirements.
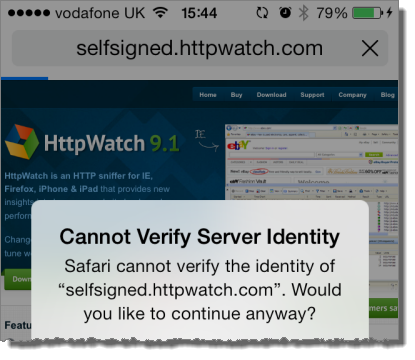
The downside of using self-signed certificates is that browsers will not automatically trust sites that use them. In Mobile Safari you would see an error like this:
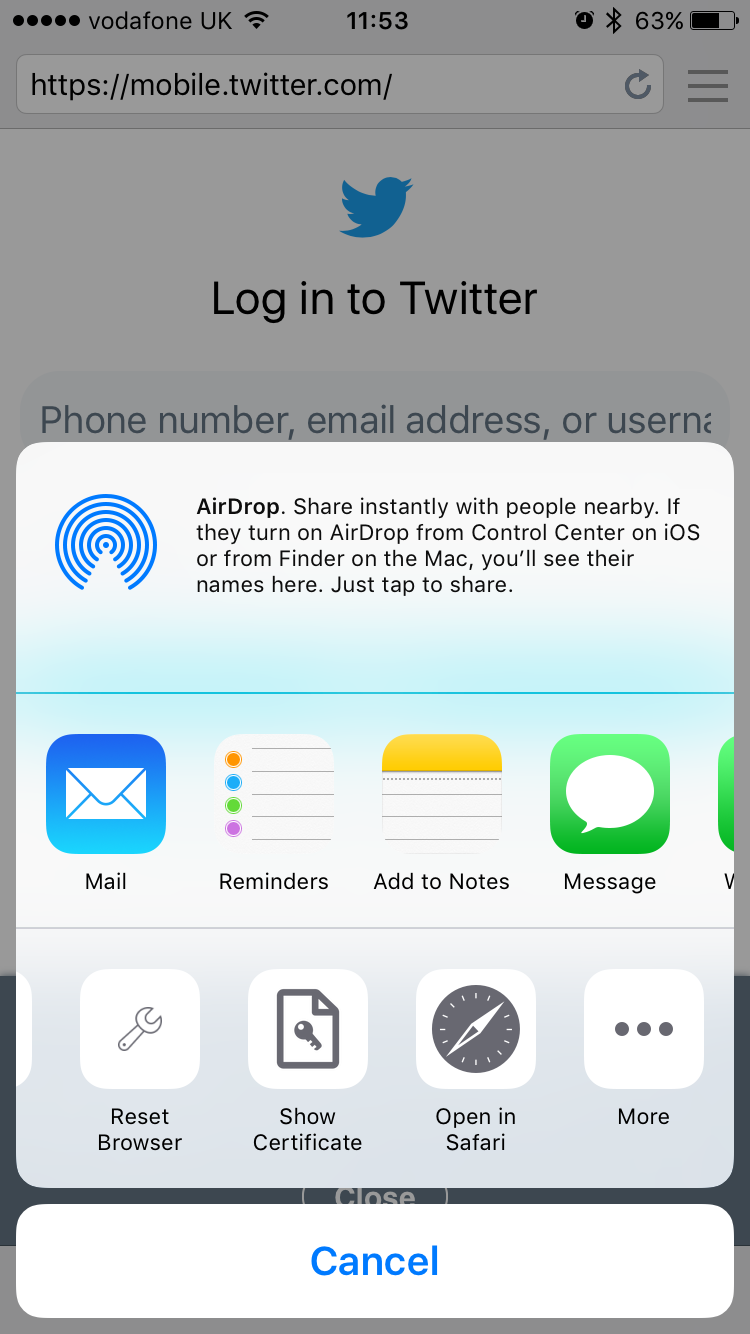
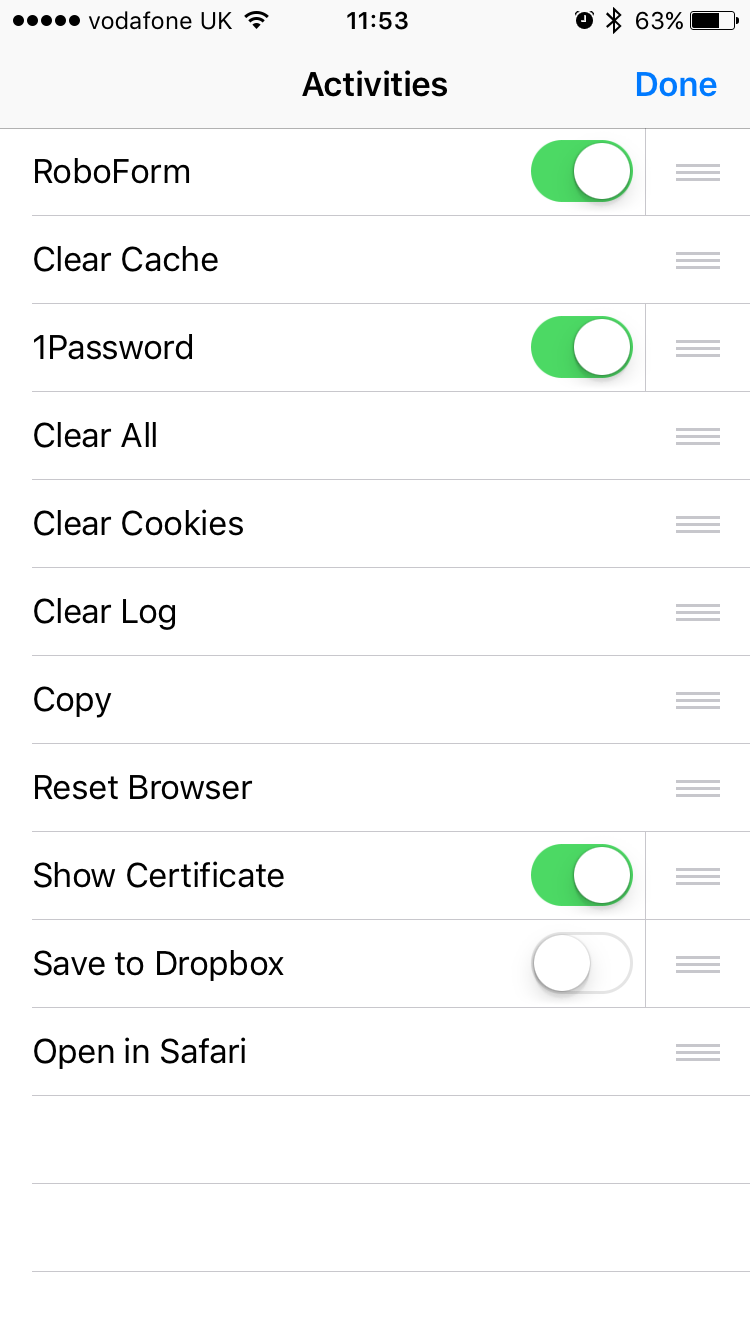
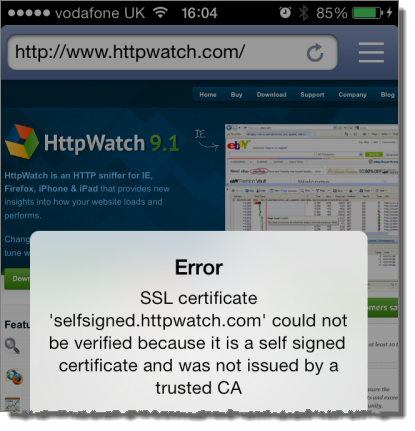
The HttpWatch iOS app provides some more detail:
The rest of this post provides tips on how to setup iOS to avoid these errors and how to simplify the creation and management of self signed certificates.
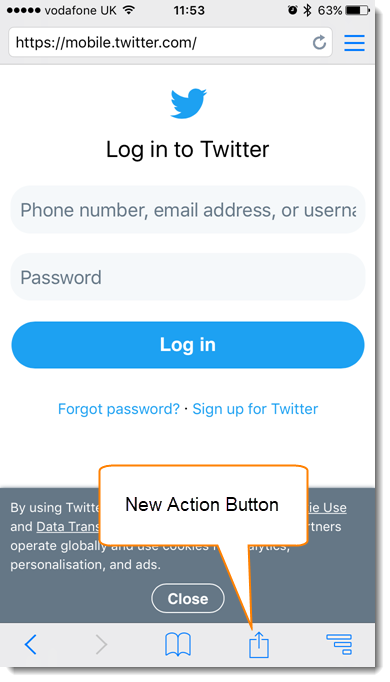
Tip #1 – Don’t Accept your Self-Signed Certificate in Mobile Safari
It’s tempting to just select Continue or Details->Accept when you first try using your self-signed certificate in Safari:
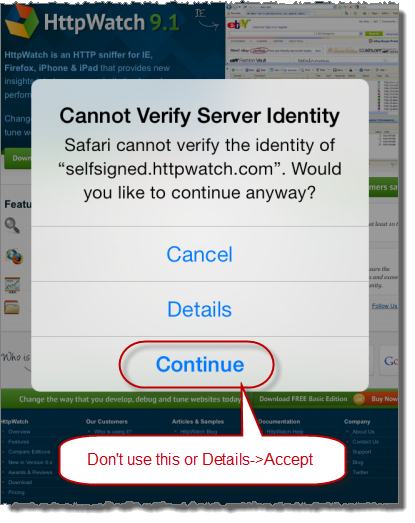
This would allow you to open the site in Safari, but there are two significant downsides:
- Accepting the certificate in Safari just adds an SSL exception that prevents Safari warning you about the site. It doesn’t install the certificate as a trusted certificate on iOS. Any other apps (e.g. Chrome, HttpWatch, etc…) on the device will still fail to connect to the site.
- Once the SSL exception is added there doesn’t seem to be a way to remove it in iOS 7. In previous versions going to Settings->Safari and selecting ‘Clear Cookies and Data’ would delete it. This no longer seems to work in iOS 7 (please leave a comment if you know how to do this).
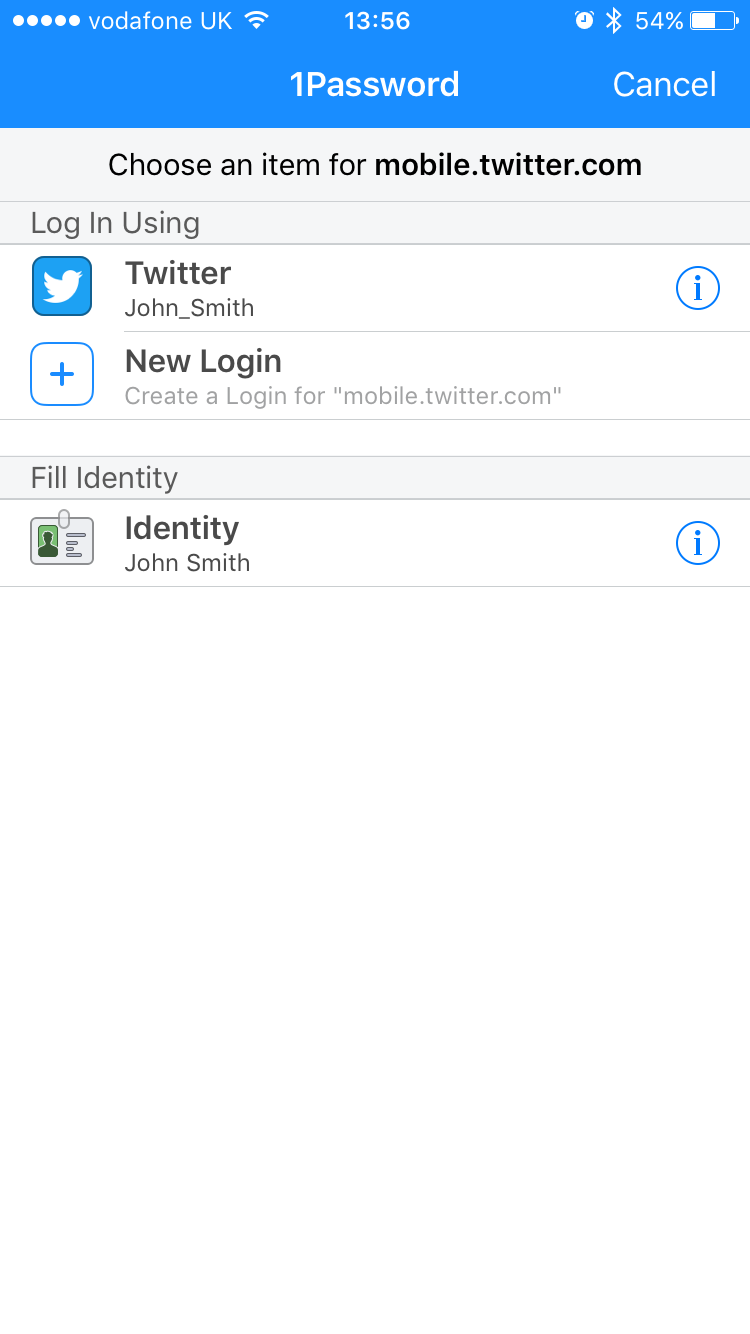
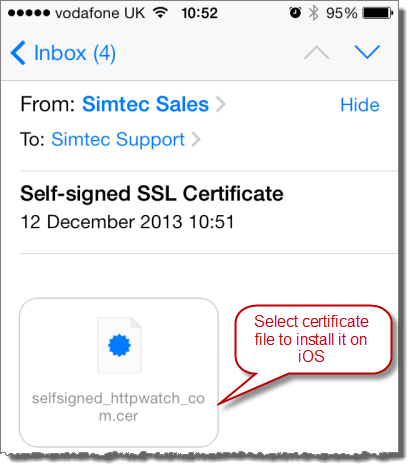
Tip #2 – Install Self-Signed Certificates as an iOS Configuration Profile
You can add an SSL certificate to the trusted list in iOS by simply emailing the file to yourself as an attachment:
Then select Install to add the certificate. Once you’ve done this you use the certificate without warnings in Safari or other iOS apps that use the device’s keychain..
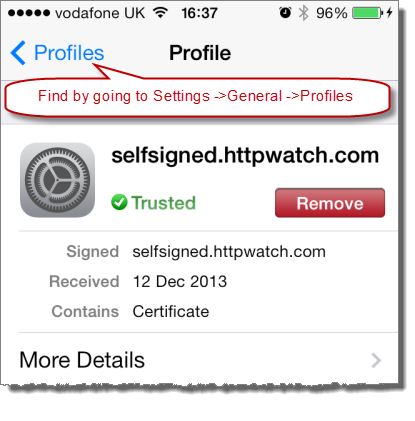
Also unlike Safari SSL exceptions, you can access the certificate at any time in Settings->General->Profiles and remove it if required:
Apple provides an iPhone configuration utility for Mac and PC that can also install certificates. This would be a better option where email is not available or you have a larger number of iOS devices to manage.
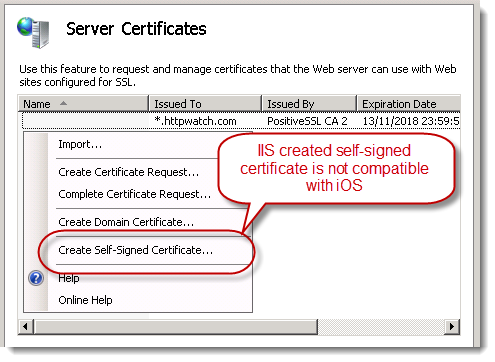
Tip #3 – Don’t create Self-Signed Certificates within IIS
Creating self-signed certificates in IIS appears to be easy. You just select the ‘Create Self-Signed Certificate’ menu item:
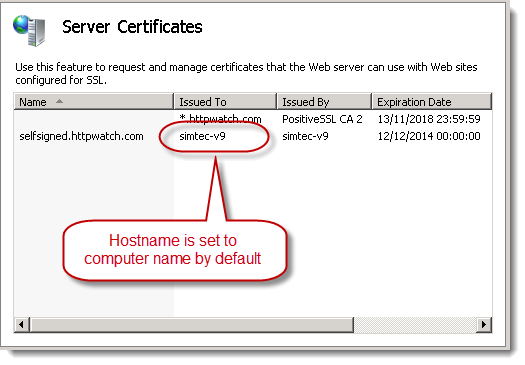
Unfortunately, IIS uses the computer name as the host name in the certificate:
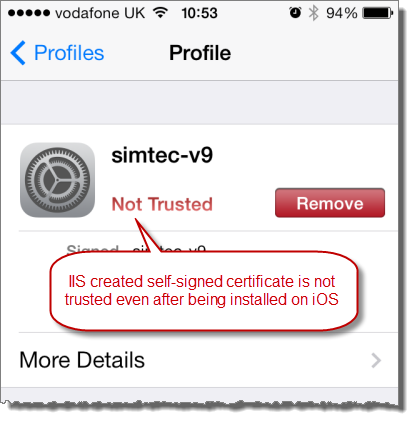
It most cases the computer name will not match the intended host name and you end up with a self-signed certificate that is never trusted – even when it is added to iOS:
It’s possible to fix this problem by installing and running the SelfSSL tool from the IIS 6 Toolkit. However, it’s probably easier just to use OpenSSL as described in the next tip.
Tip #4 – Creating Self-Signed Certificates with OpenSSL is Easy
One of the easiest ways of creating a self-signed certificate is to use the OpenSSL command line tool that is available on most platforms and installed by default on Mac OSX.
First create a private key file:
openssl genrsa -out myselfsigned.key 2048
Then create the self signed certificate:
openssl req -new -x509 -sha256 -key myselfsigned.key -out myselfsigned.cer -days 365
-subj /CN=www.mysite.com
You can use any filenames you like for the key and certificate (.cer) files. The /CN parameter needs to be set to the required hostname (e.g. for https://www.mysite.com in the example above). The days parameter specifies the expiration date as days from today’s date.
There’s even a site to do this if you don’t feel like downloading OpenSSL, but of course it’s more secure to do it yourself.
On Apache servers the key and certificate file can be used directly in your SSL configuration. With IIS you need a PFX file so that you can import the certificate into the Server Certificates section of IIS. OpenSSL can create the PFX file for you as well:
openssl pkcs12 -export -out myselfsigned.pfx -inkey myselfsigned.key
-in myselfsigned.cer
Tip # 5: Consider Creating Your Own Certificate Authority (CA)
One problem with self-signed certificates is that you’ll need to set up trust relationships for each certificate on each device. An alternative is to create your own Certificate Authority (CA) root certificate and then create certificates based on it.
Instead of paying a commercial CA to create SSL certificates on your behalf, you are acting as your own CA. The advantage is that your custom CA certificate only has to be installed once on each device. The devices will then automatically trust any certificates you issue based on your root CA certificate.
Creating the CA certificate is a simple two step process. First create a private key file as before:
openssl genrsa -out myCA.key 2048
Then create the certificate:
openssl req -x509 -sha256 -new -key myCA.key -out myCA.cer -days 730
-subj /CN="My Custom CA"
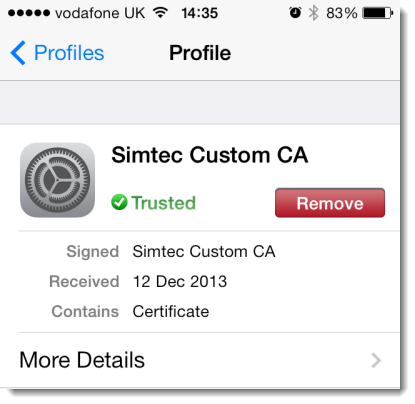
The certificate file (myCA.cer) created above can be publicly shared and installed on iOS or other OS’s to act like a built in trusted root CA. Custom CA certificates on iOS are also stored in General->Settings->Profile:
The private key file (myCA.key) is only used when creating new SSL certificates.
You can create as many certificates as you like based on this CA certificate. There’s an extra step involved because you have to create a CSR (Client Signing Request) as if you were purchasing a commercial SSL certificate.
First you would create a private key:
openssl genrsa -out mycert1.key 2048
and then create the CSR:
openssl req -new -out mycert1.req -key mycert1.key -subj /CN=www2.mysite.com
Then use the CSR to create the certificate:
openssl x509 -req -sha256 -in mycert1.req -out mycert1.cer -CAkey myCA.key
-CA myCA.cer -days 365 -CAcreateserial -CAserial serial
The certificate created (mycert.cer) can be installed on a web server and accessed from any iOS device that already has the CA certificate installed.
UPDATED September 24th, 2015 – The OpenSSL certificate creation commands now include the -sha256 flag to avoid browser warnings about the use of SHA1. This tip was provided in a comment by Giancarlo Gomez – Thanks
You can check SSL/TLS configuration our new SSL test tool
SSLRobot . It will also look for potential issues with the certificates, ciphers and protocols used by your site.
Try it now for free!